Construction
SCUL Ship Construction
While one could argue that the most important element of a bicycle chopper gang are the people, it's not a bicycle chopper gang without choppers. Probably the most appealing part of cutting up hulls and putting them back together wrong is that ergonomic rules must be broken. It can be liberating to force function into form.
Fundamental Ship Modification
No matter how cool you are, you can't break the laws of physics; at least don't let them catch you. SCUL has built a literal ton of ships and made a metaphorical ton of mistakes: so listen up.
Hull Integrity is Paramount
Spaceworthy ship design places pilot-safety at alpha-priority. Our theory is that all ships eventually suffer hull-failure: knowing how it will most likely fail and determining what happens to the pilot when it does must be a guiding factor in design. Ships can heal a lot faster than pilots. Any area of the ship that would cause injury to the pilot if it failed must be reinforced as much as possible in order to make sure it fails somewhere safer. While well-designed civilian craft certainly has a focus on weight efficiency, SCUL craft must put pilot safety before all other factors. Extending areas of a ship increases hull stress well beyond normal limits. Think of these extensions as leverage bars.
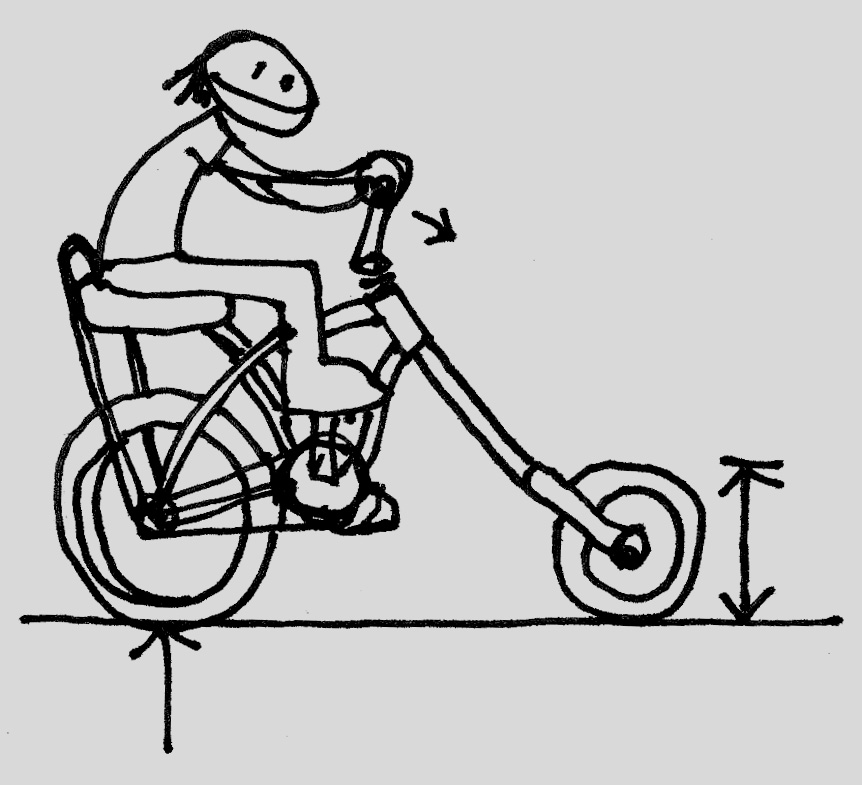
Let's take ram extension, for example. If the length of the fork is increased by two feet, that's like putting a three-foot crow bar through the bow of a ship. The forces of retro rockets, space turbulence, and pilot mass is significantly amplified.
While SCUL uses derelicts to build our mighty spacecraft, we use new 4130 Chromoly steel where strength is needed most. Besides, if the wall thickness is .058", not only is it very strong, it sleeves nicely over tubing that is 1/8" thinner in diameter.
Coping a Tube to Fit Another Tube
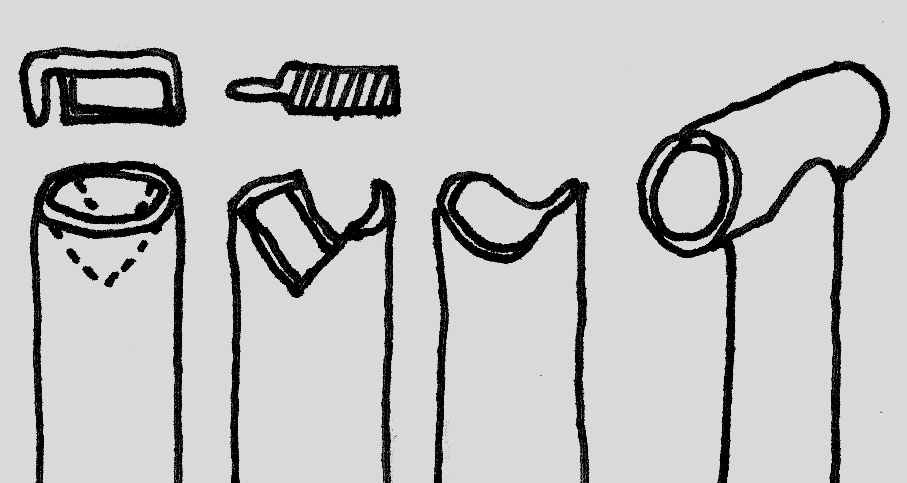
There are ways to cope a tube with hole saws and milling machines, but SCUL typically uses a hacksaw and files. Make your rough cuts with a hack saw and then follow up with an aggressive half-round file. There are online coping mechanisms you can use to generate printable templates to can wrap around a tube.
If you can get the tube you need to cope into a vise with tubing blocks, it makes for an easier time, however sometimes you can't because that tube is connected to a gangly set of other tubes.
Steerer Length
Whenever possible it is advised to use the original ram on the civilian ship. This ensures that it is the correct length, which is about 1.25" longer than the head tube.
If you are using a fork from a different ship, be mindful of steerer size. If you are able to ream out the head tube of a cruiser, it can be retrofitted to use an 1 1/8" fork.
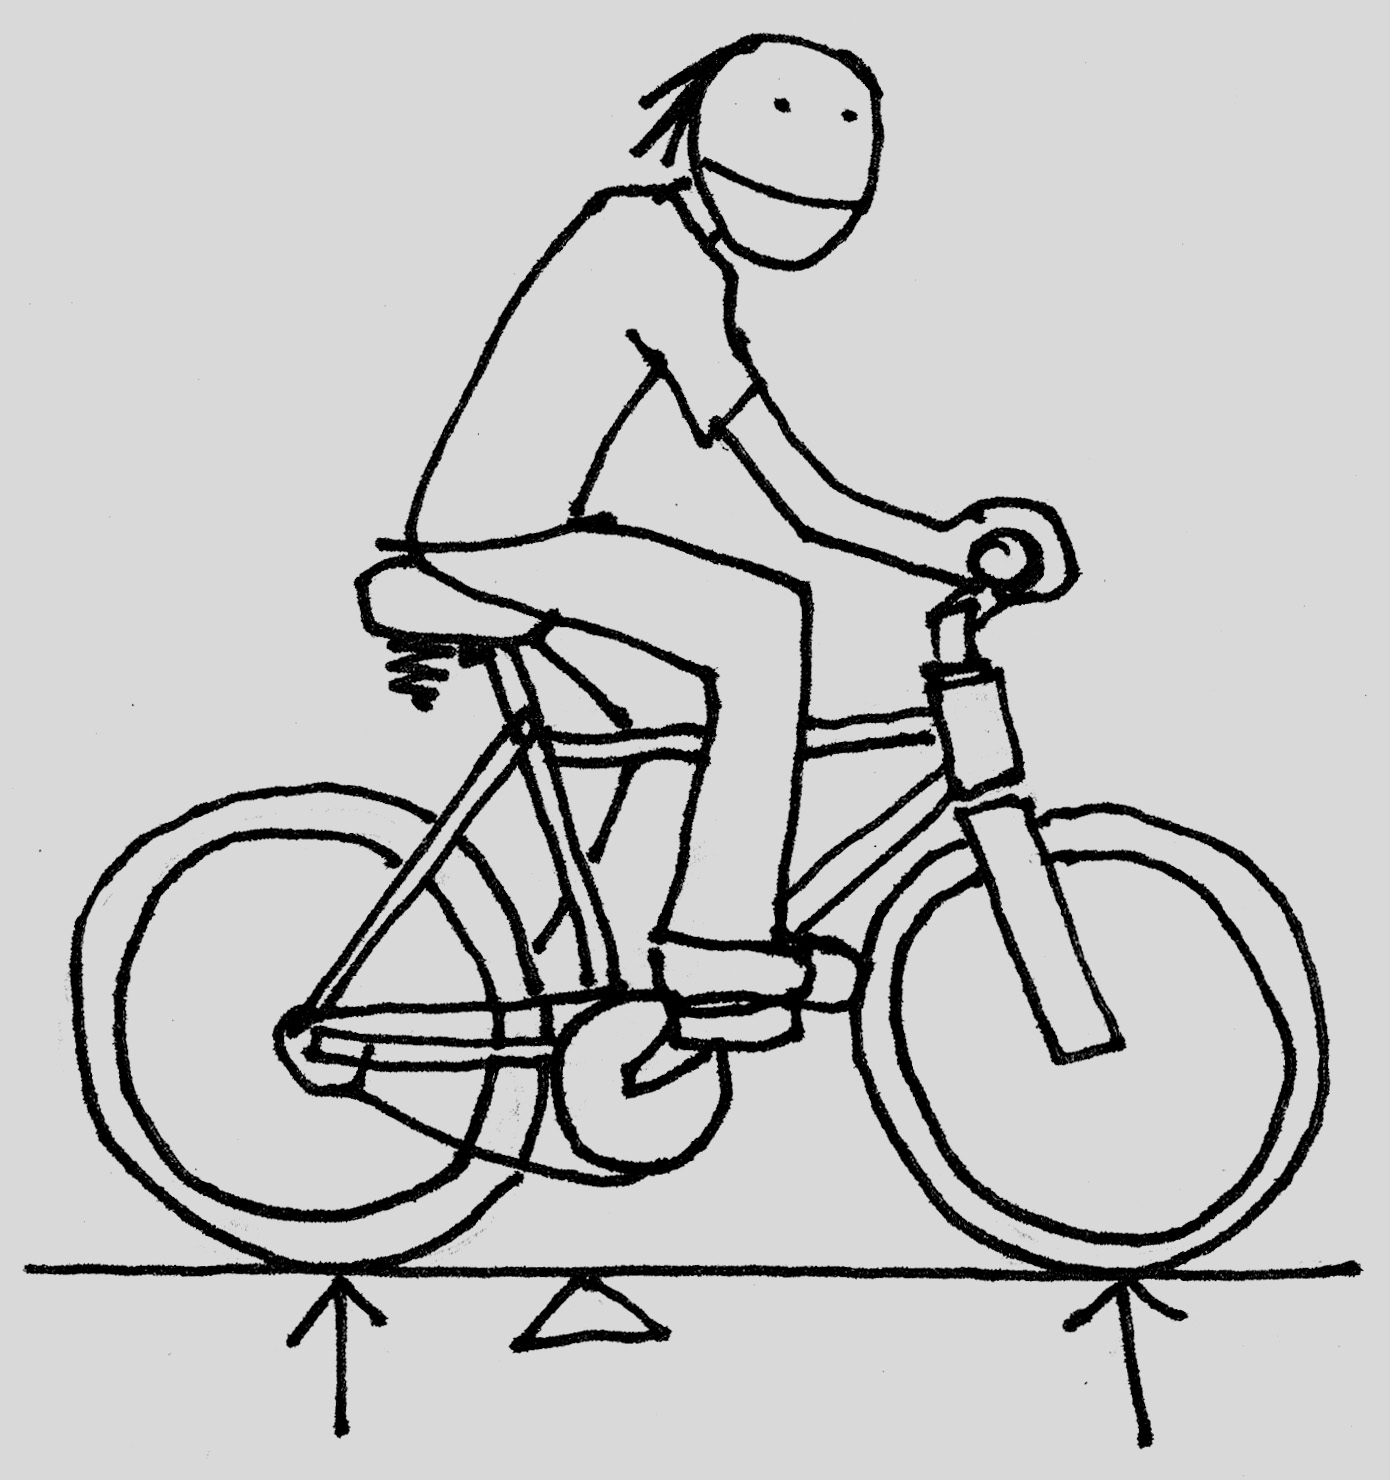
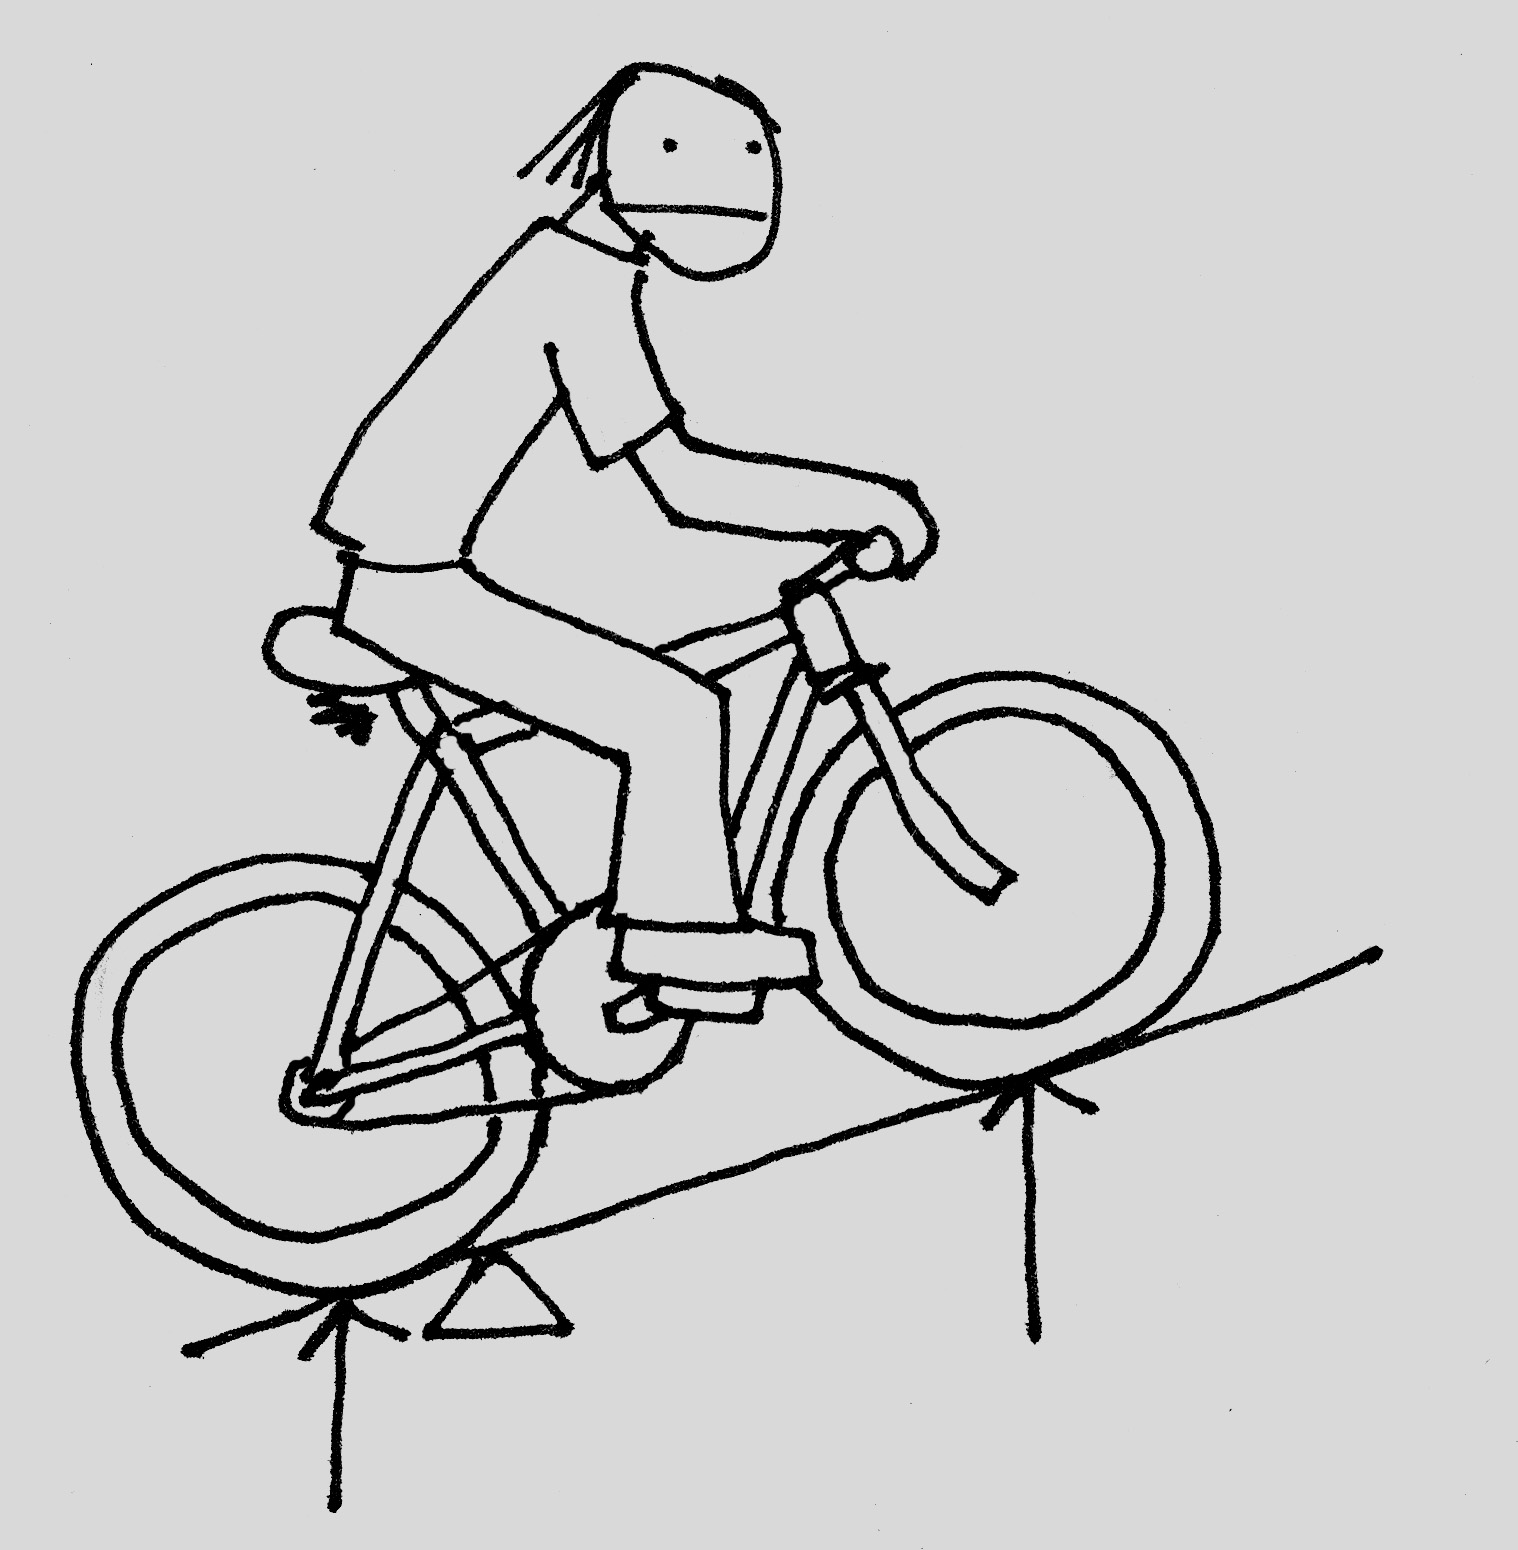
Coping with Center of Gravity
When changing a civi ship's design, make sure your center of gravity stays between the thruster cores. Keep in mind that the closer your center of gravity gets to either thruster, the more difficulty the pilot will experience when traversing areas of space with heavy g-well activity. The very nature of a chopper is to place the center of gravity too far back, but there are ways to compensate.
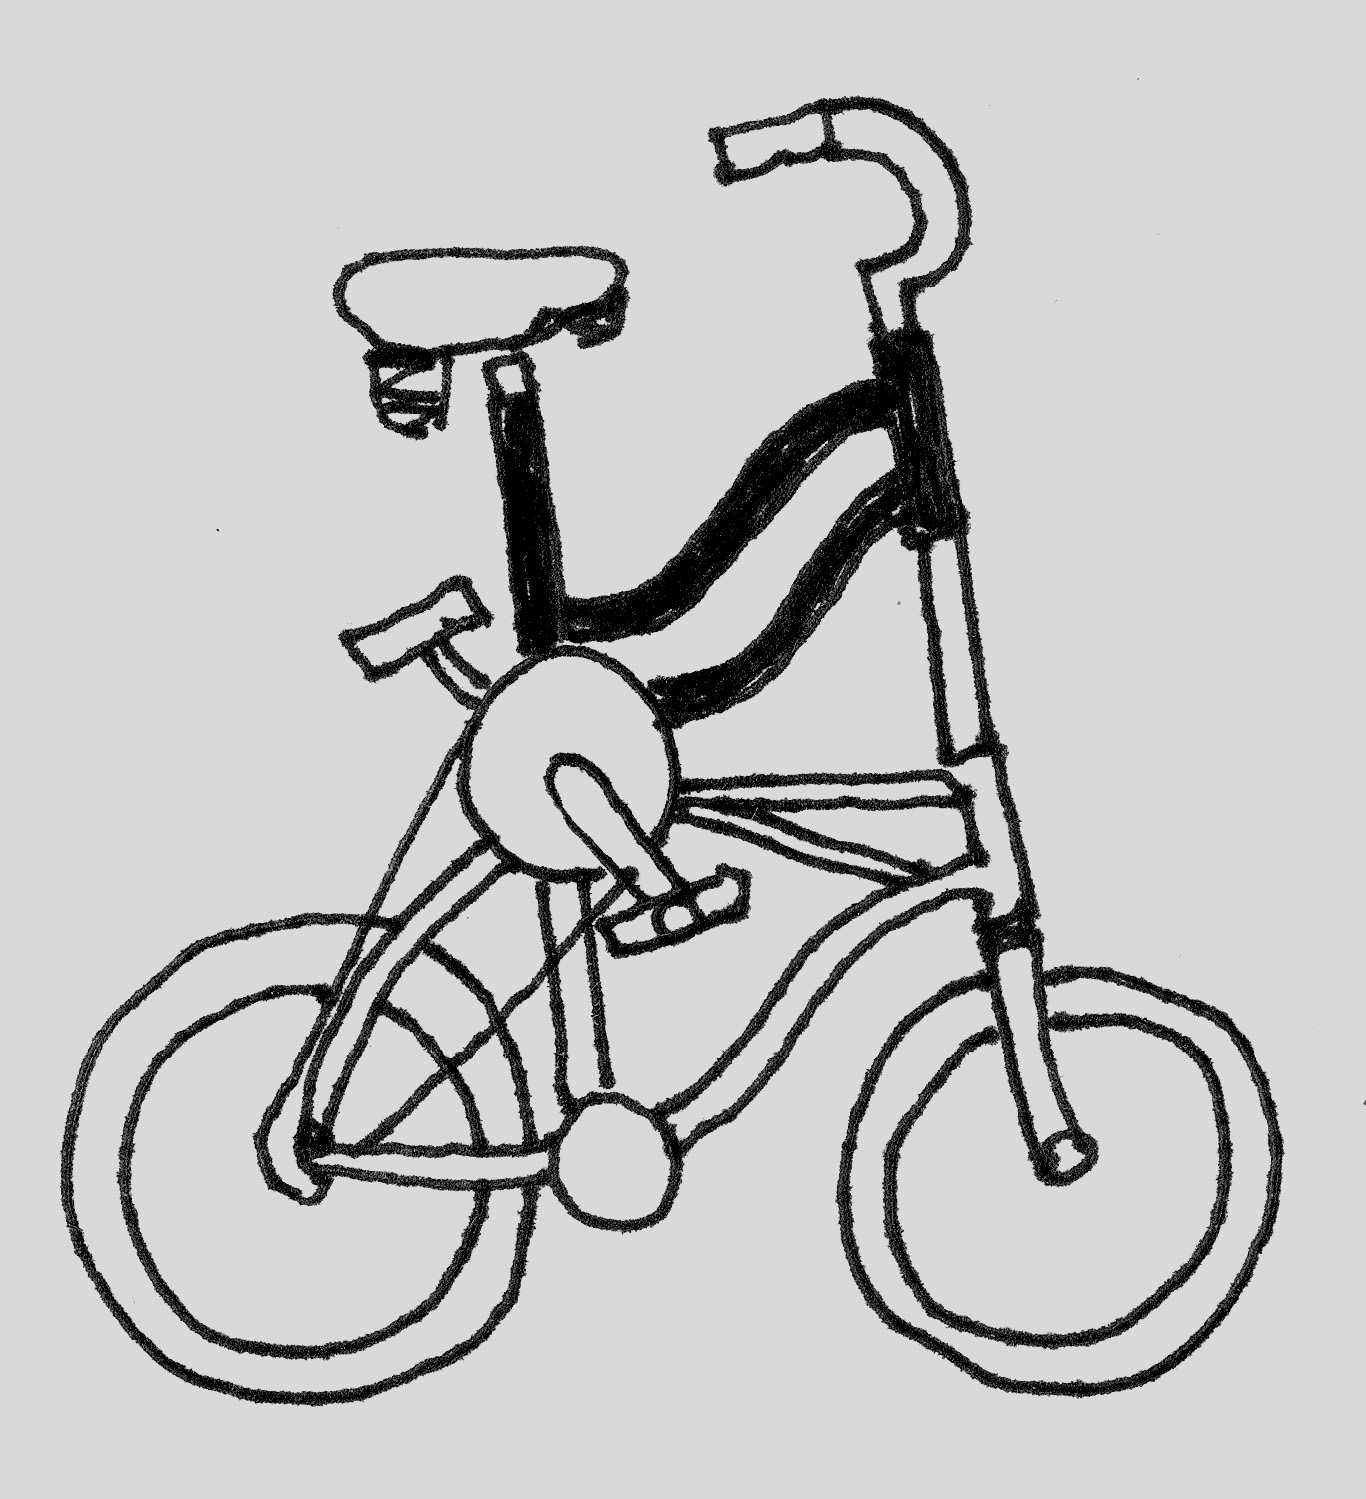
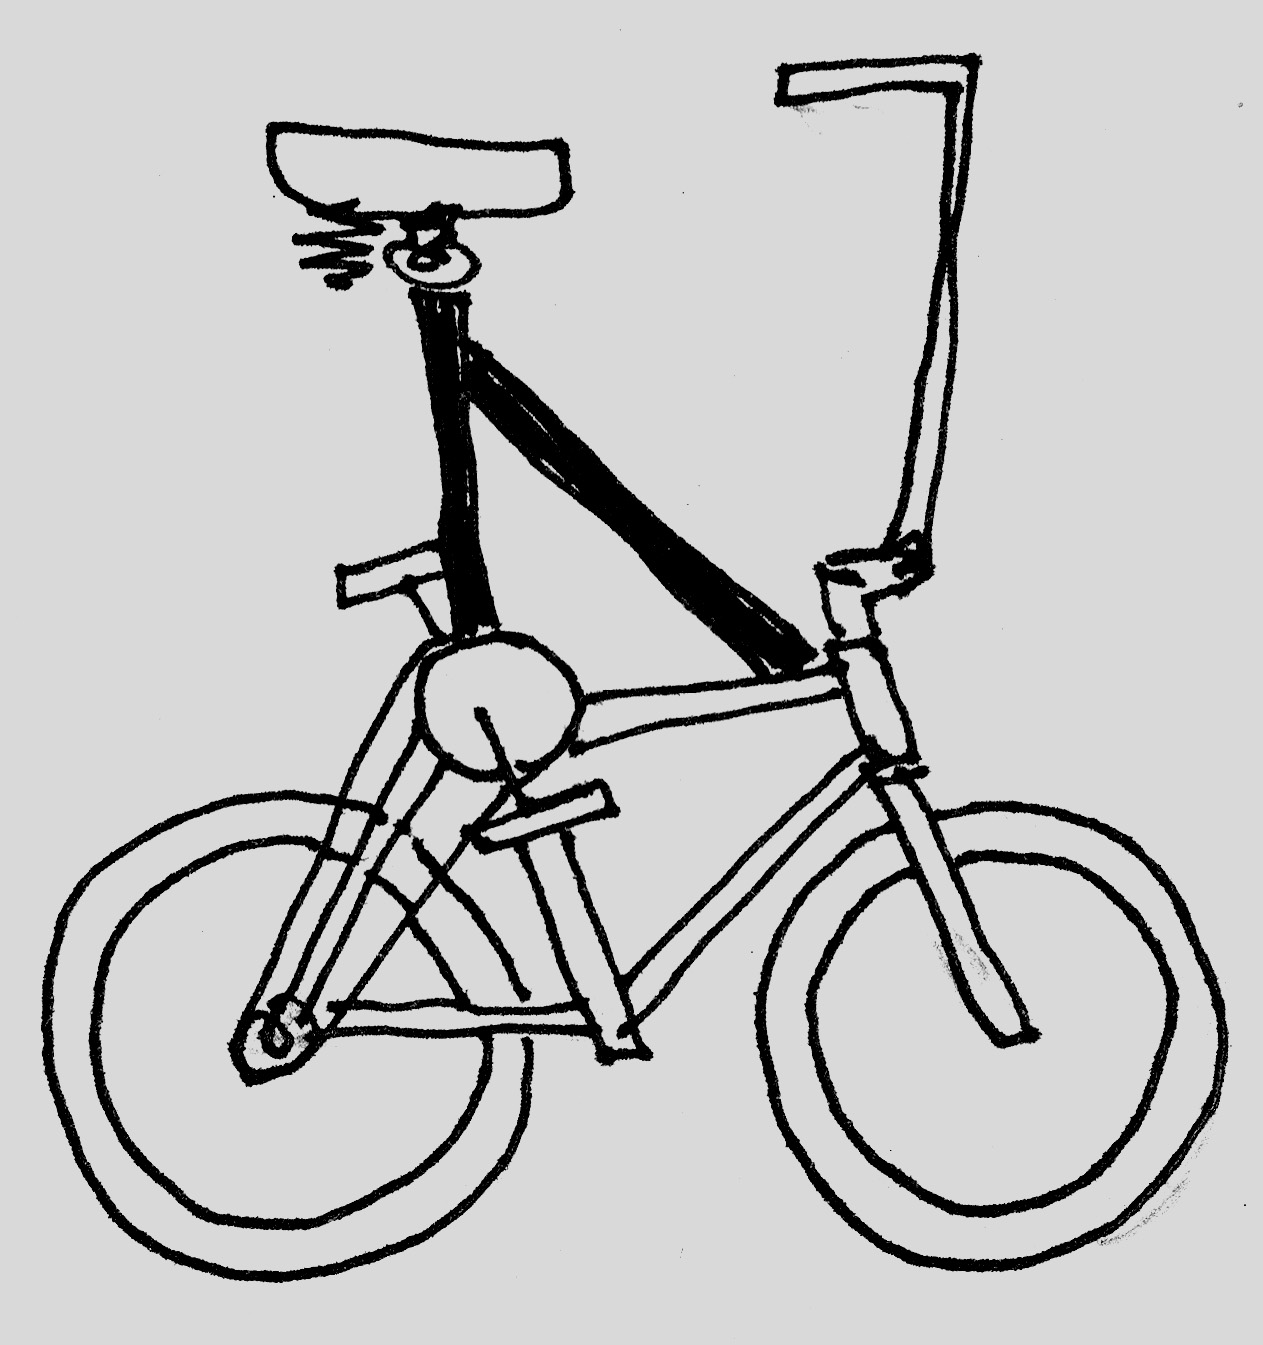
Rotate the Handlebars forward
Point the bars forward make the pilot lean forward, this has a dramatic effect on center of gravity and is easy to do. It gives the ship a more 'scoopy' feel when turning, so be careful not to go too far.
Use a Smaller Navi Thruster
Changing the wheel sizes will raise or lower the front axle by the difference in the radii of the navigational thruster. This is easy to do - keep in mind the smaller the navi thruster, the more it will be affected by turbulence. See USB Pestilence for an example.
Flip the Seat Binder so That the Saddle is More Forward
It only moves the center of gravity forward a couple of inches - however sometimes that's all that's needed. Many SCUL ships use this technique. If that's not enough, the seat can be clamped to the top tube, if there are stanchions to keep the saddle from rolling. A good example of this would be USB Abandon All Hope.
Increase Fork Rake
By bending the fork up a little, it moves the ship lower to the ground. An extreme example would be USB Bonz Bik. It makes the ship handle like a wheelbarrow, and may put additional stress on the ram and the bow: proceed cautiously.
Slack out the Head Tube Angle
There are a few ways to do this. Perhaps the simplest way is to flip the front triangle. USB Pale Horse is an example. This will give the ship a flip-floppy feel when turning, as it takes effort to make the ship go straight.
Extend the Rear Triangle
This is a non-trivial modification, but can have dramatic effects. Examples of ships that use this method are ARC Redemption and BRC Hog.
Doutube-Ram Modification
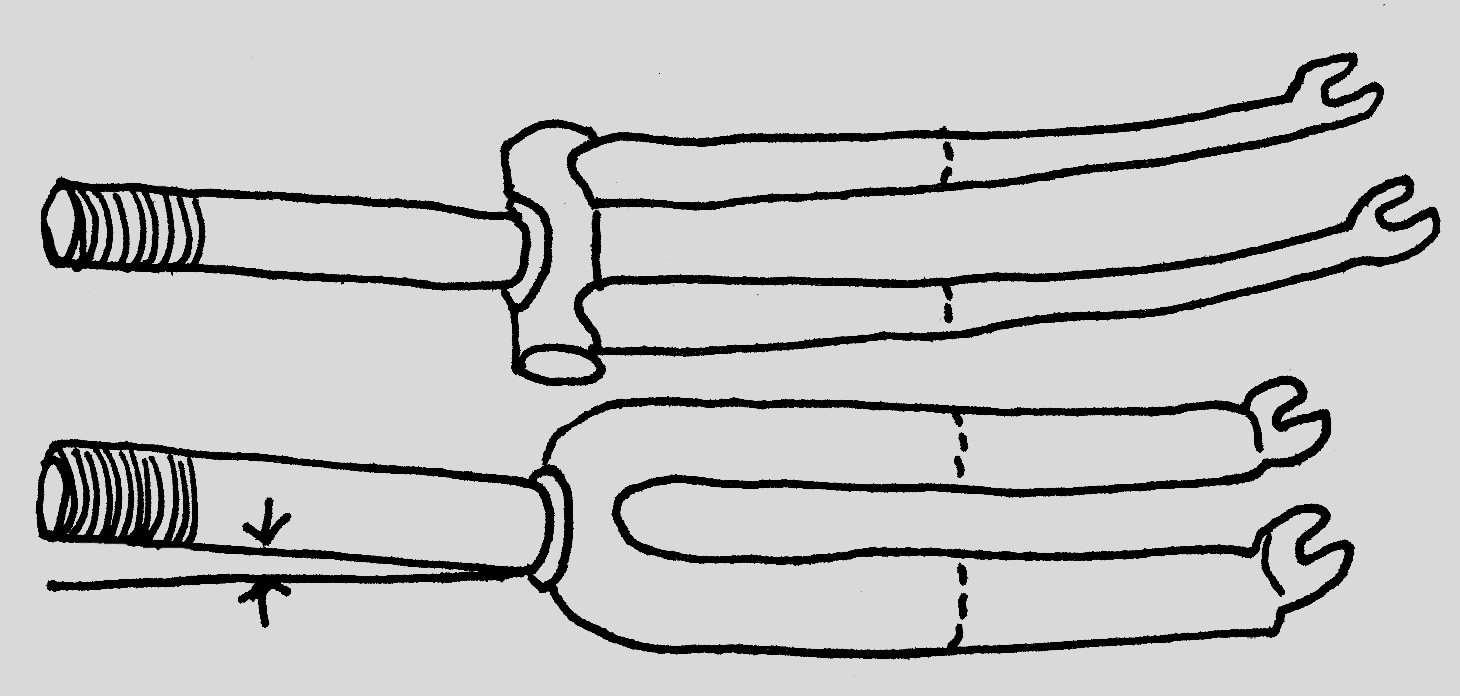
Duotube-ram modification typically involves cutting the fork in the center and extending the center or adding another ram to the ends. If the ram has straight blades keep in mind that the steerer is at an angle to it.
Navigation is typically ideal when the ram blades bend towards the bow, but rules were meant to be broken, especially when it comes to ship armament.
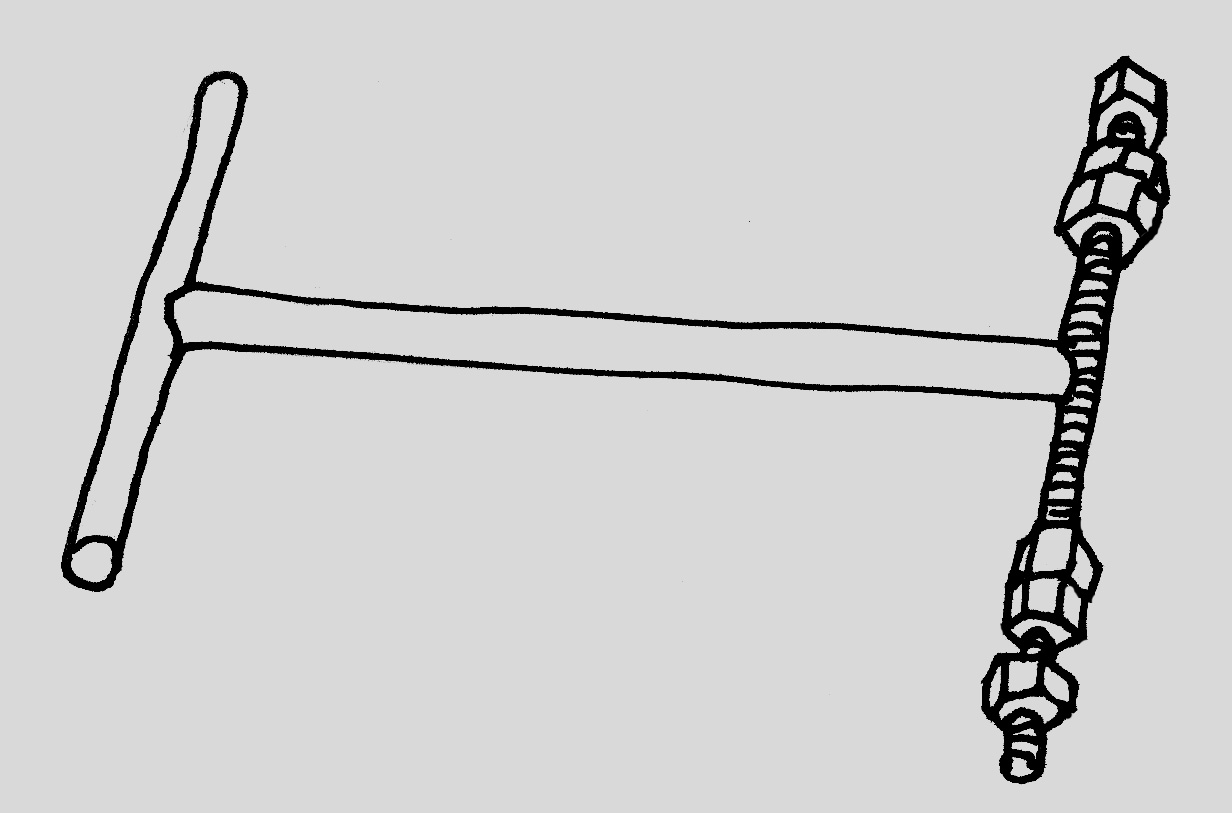
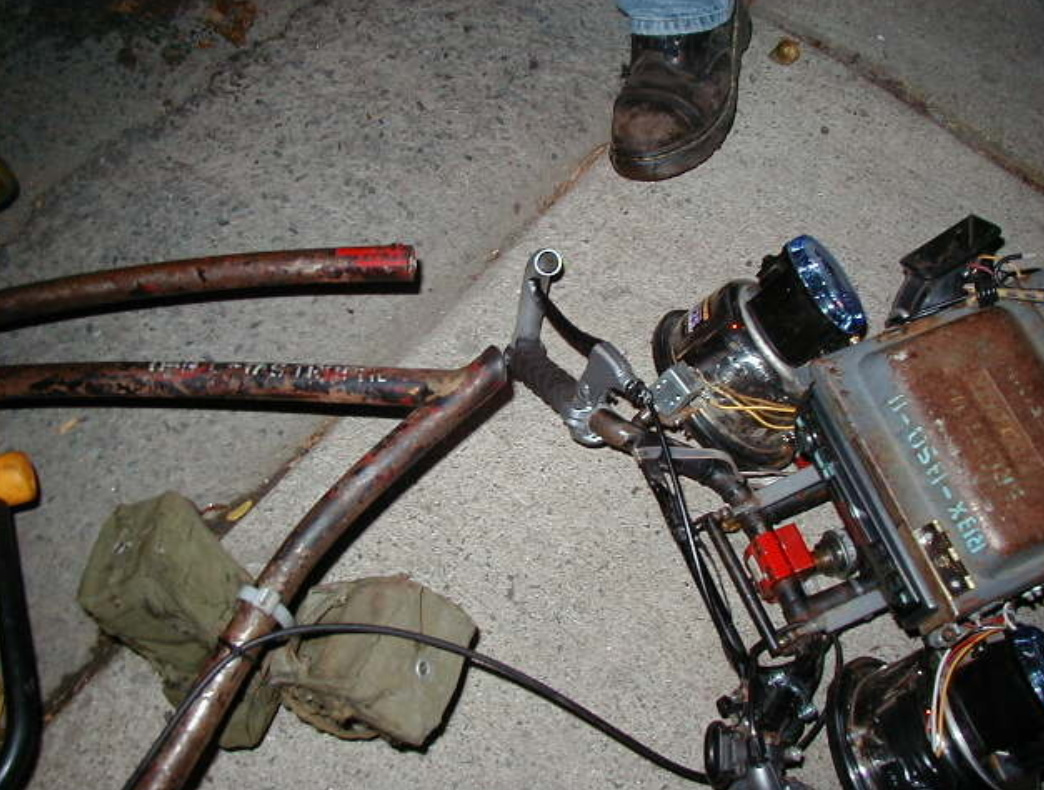
Not only do pilots make ship modifications, they sometimes make tools to make more precise ship modifications. Behold, the humble yet effective ram-jig! It's simple to construct, but it can help a lot when it comes to keeping the fork dropouts in the proper place so that they are aliged and the navi-thruster is centered and pointing in the right direction.
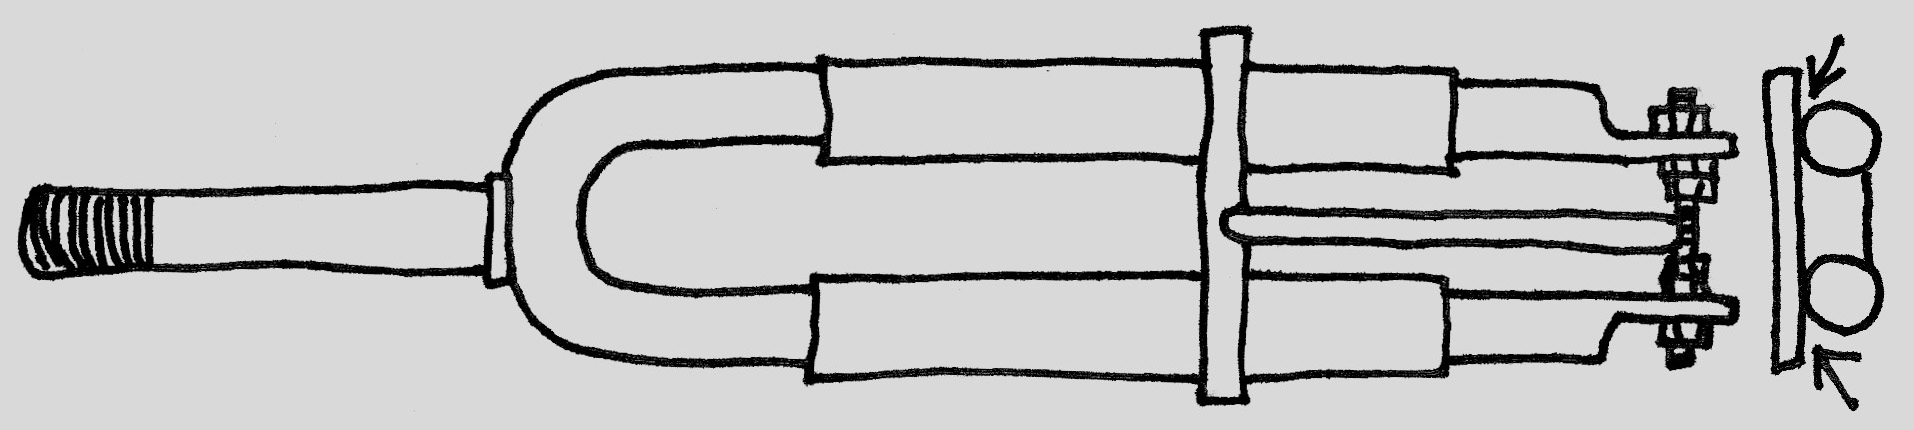
Install the ram-jig to the assembled fork pieces, adjusting length and twist. The center bar should be equidistant to the ram blades, and the cross bar should touch each side. Tack weld, check alignment again, then weld.
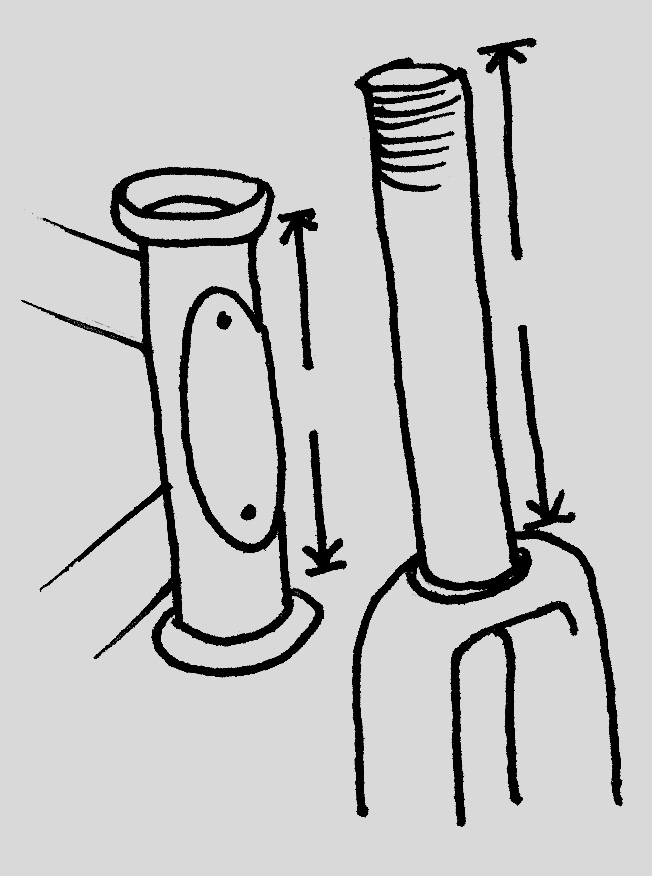
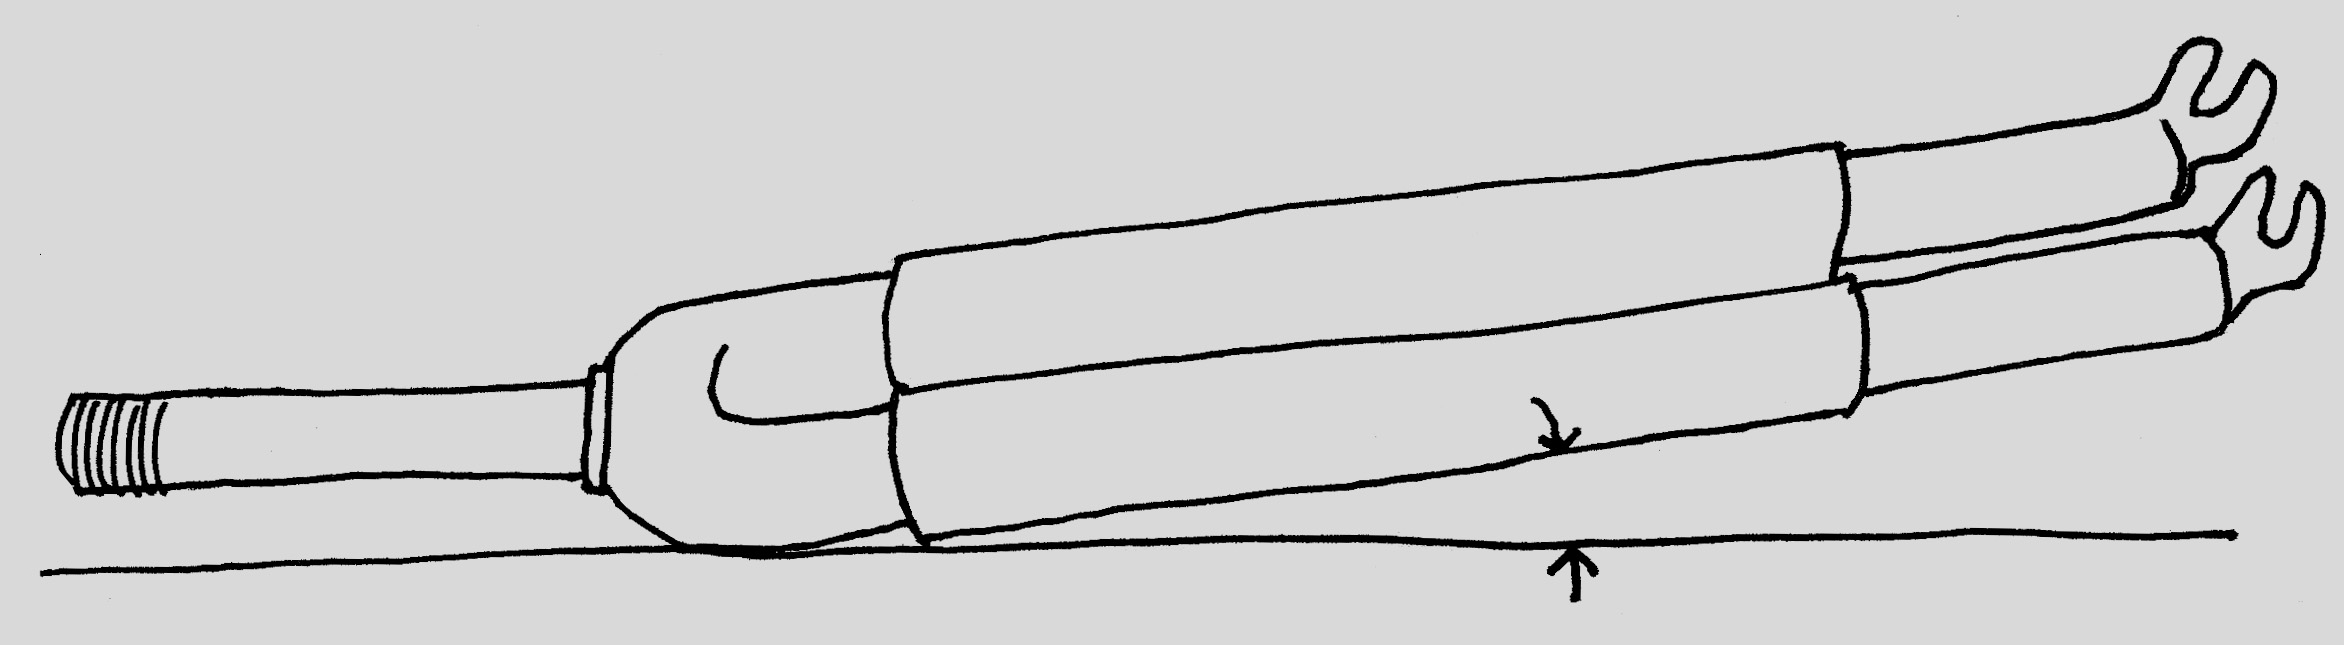
Monotube Extension
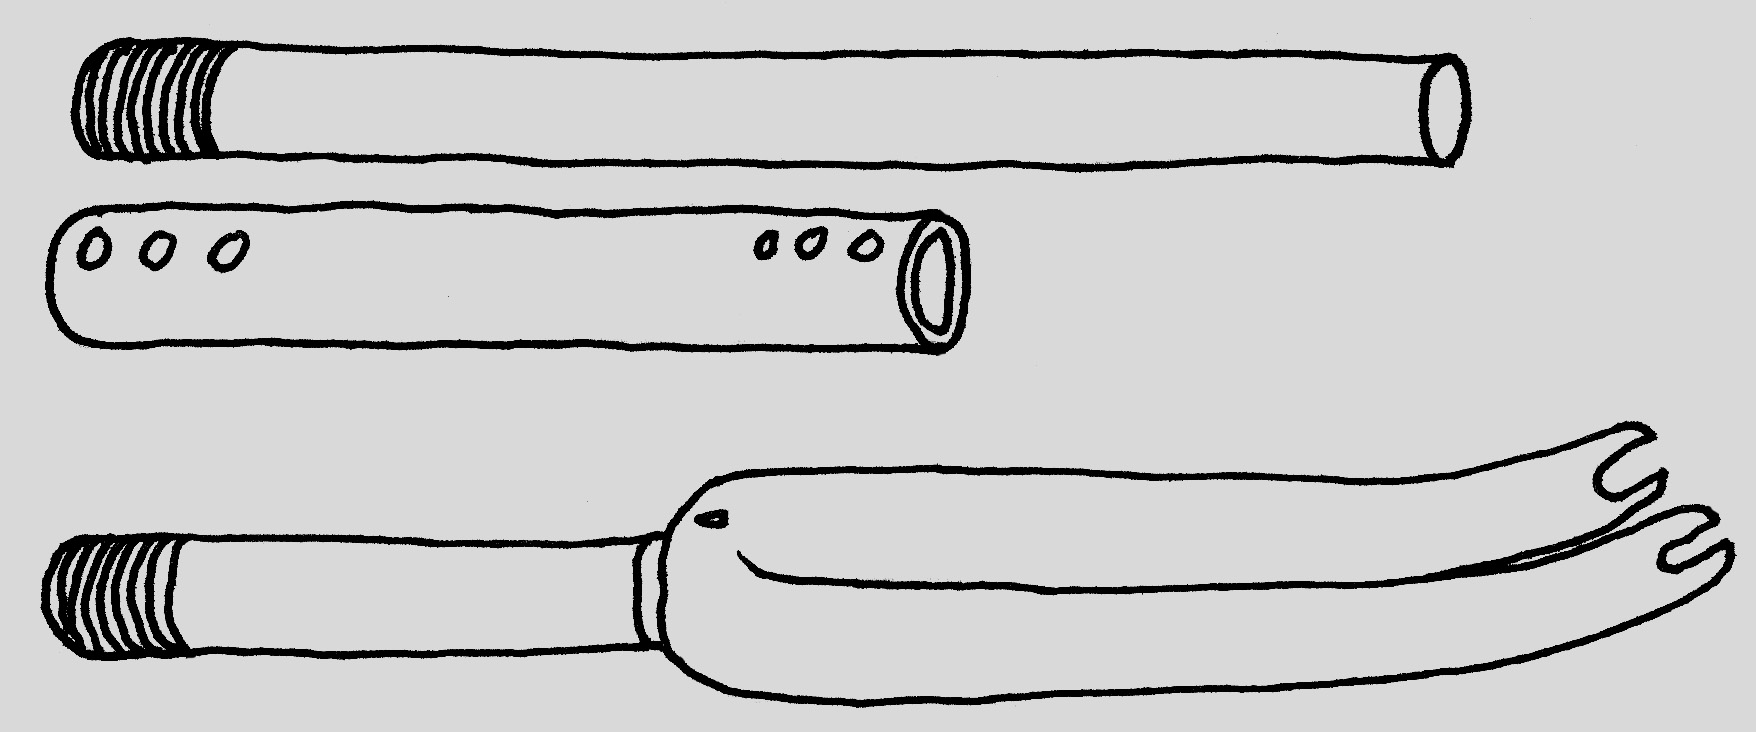
A monutube extension requires more accuracy in crucial areas, as well as some special tools. Essentially the steerer is extended by adding a new steerer and a sleeve, and plug-welded. A long steerer can be made from new material, or re-used from a scooter. Note the lip on the old fork. This is used to press fit the bottom race of the headset. This could be recreated by using a lathe on the outer piece of tubing, or by using the top threaded cone of a headset could be ground down to fit. A shim could be used, but this has proved ineffective in the rigors of space battles. While the bottom race needs replacing more often due to excessive forces a chopper endures, it can be tack-welded in place, and hack-sawed off when it gets worn out.

When setting upper steerer length, be mindful that it fits your active steerer tube on your new ship. Scooters have particularly long steerers and are ideal for the upper steerer: however SCUL has a fork threading die that can be used to cut threads. Be warned that the builder must eat many tacos to fuel this process.
HARV Construction
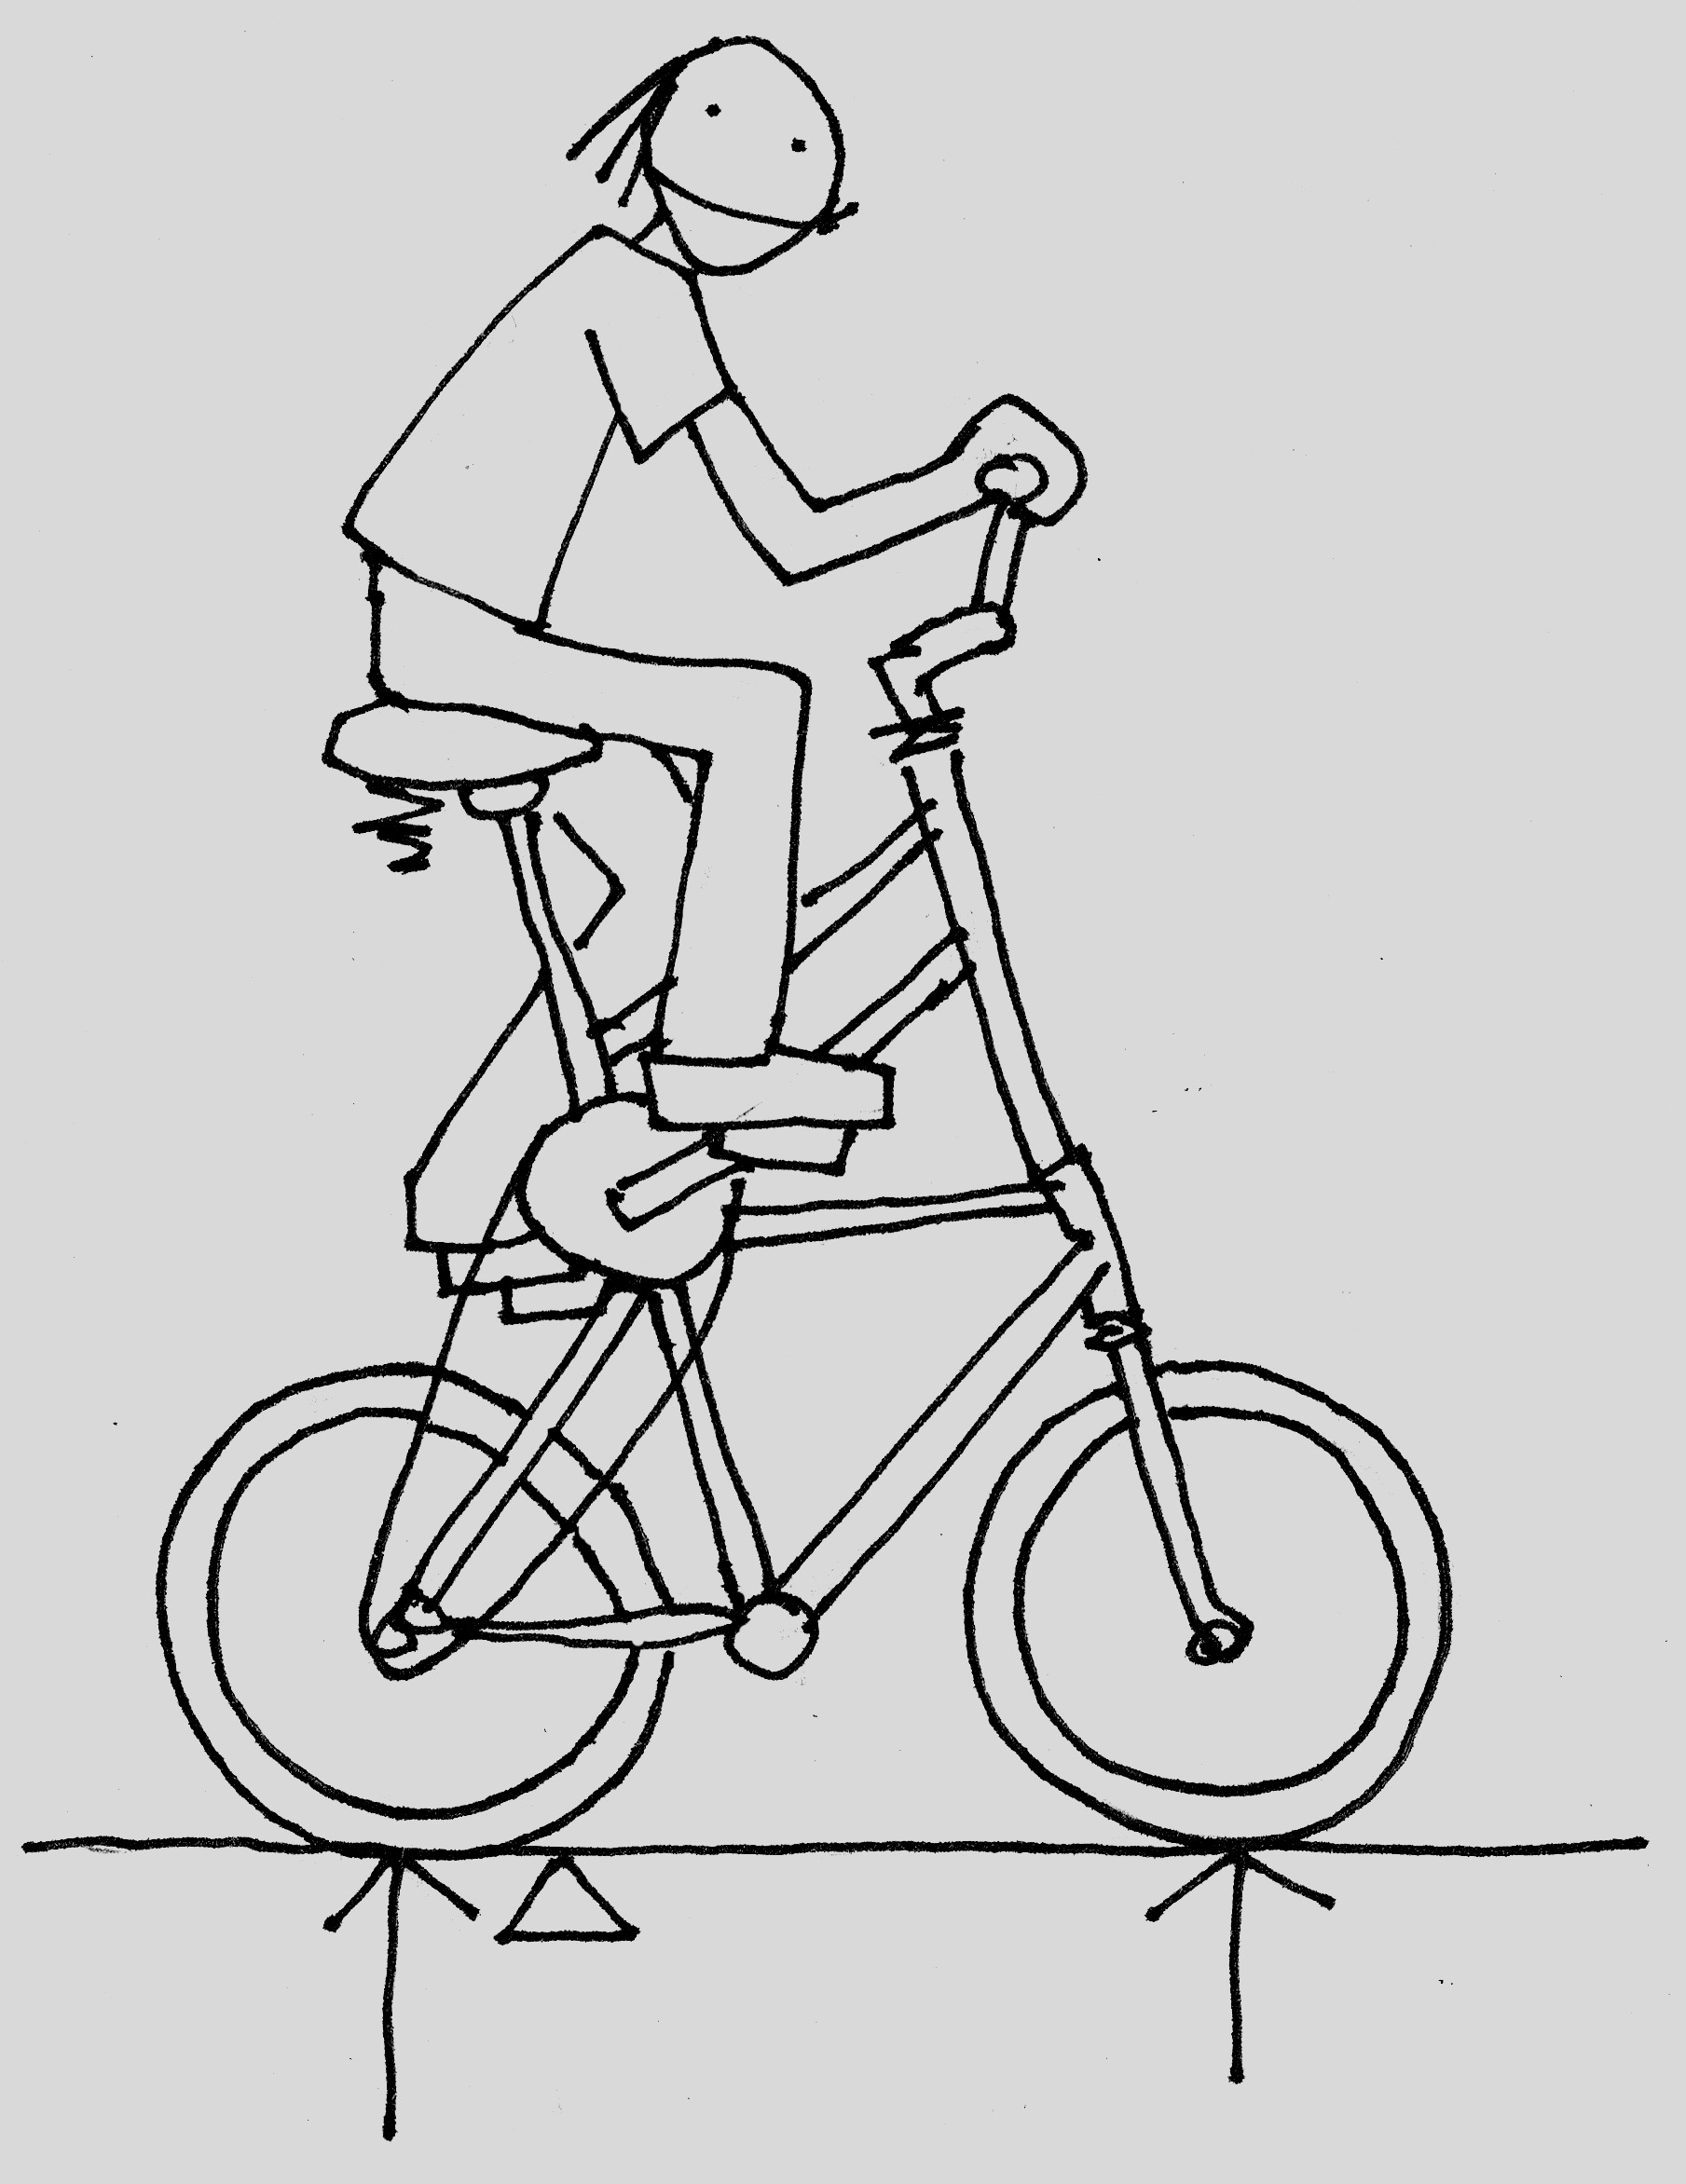
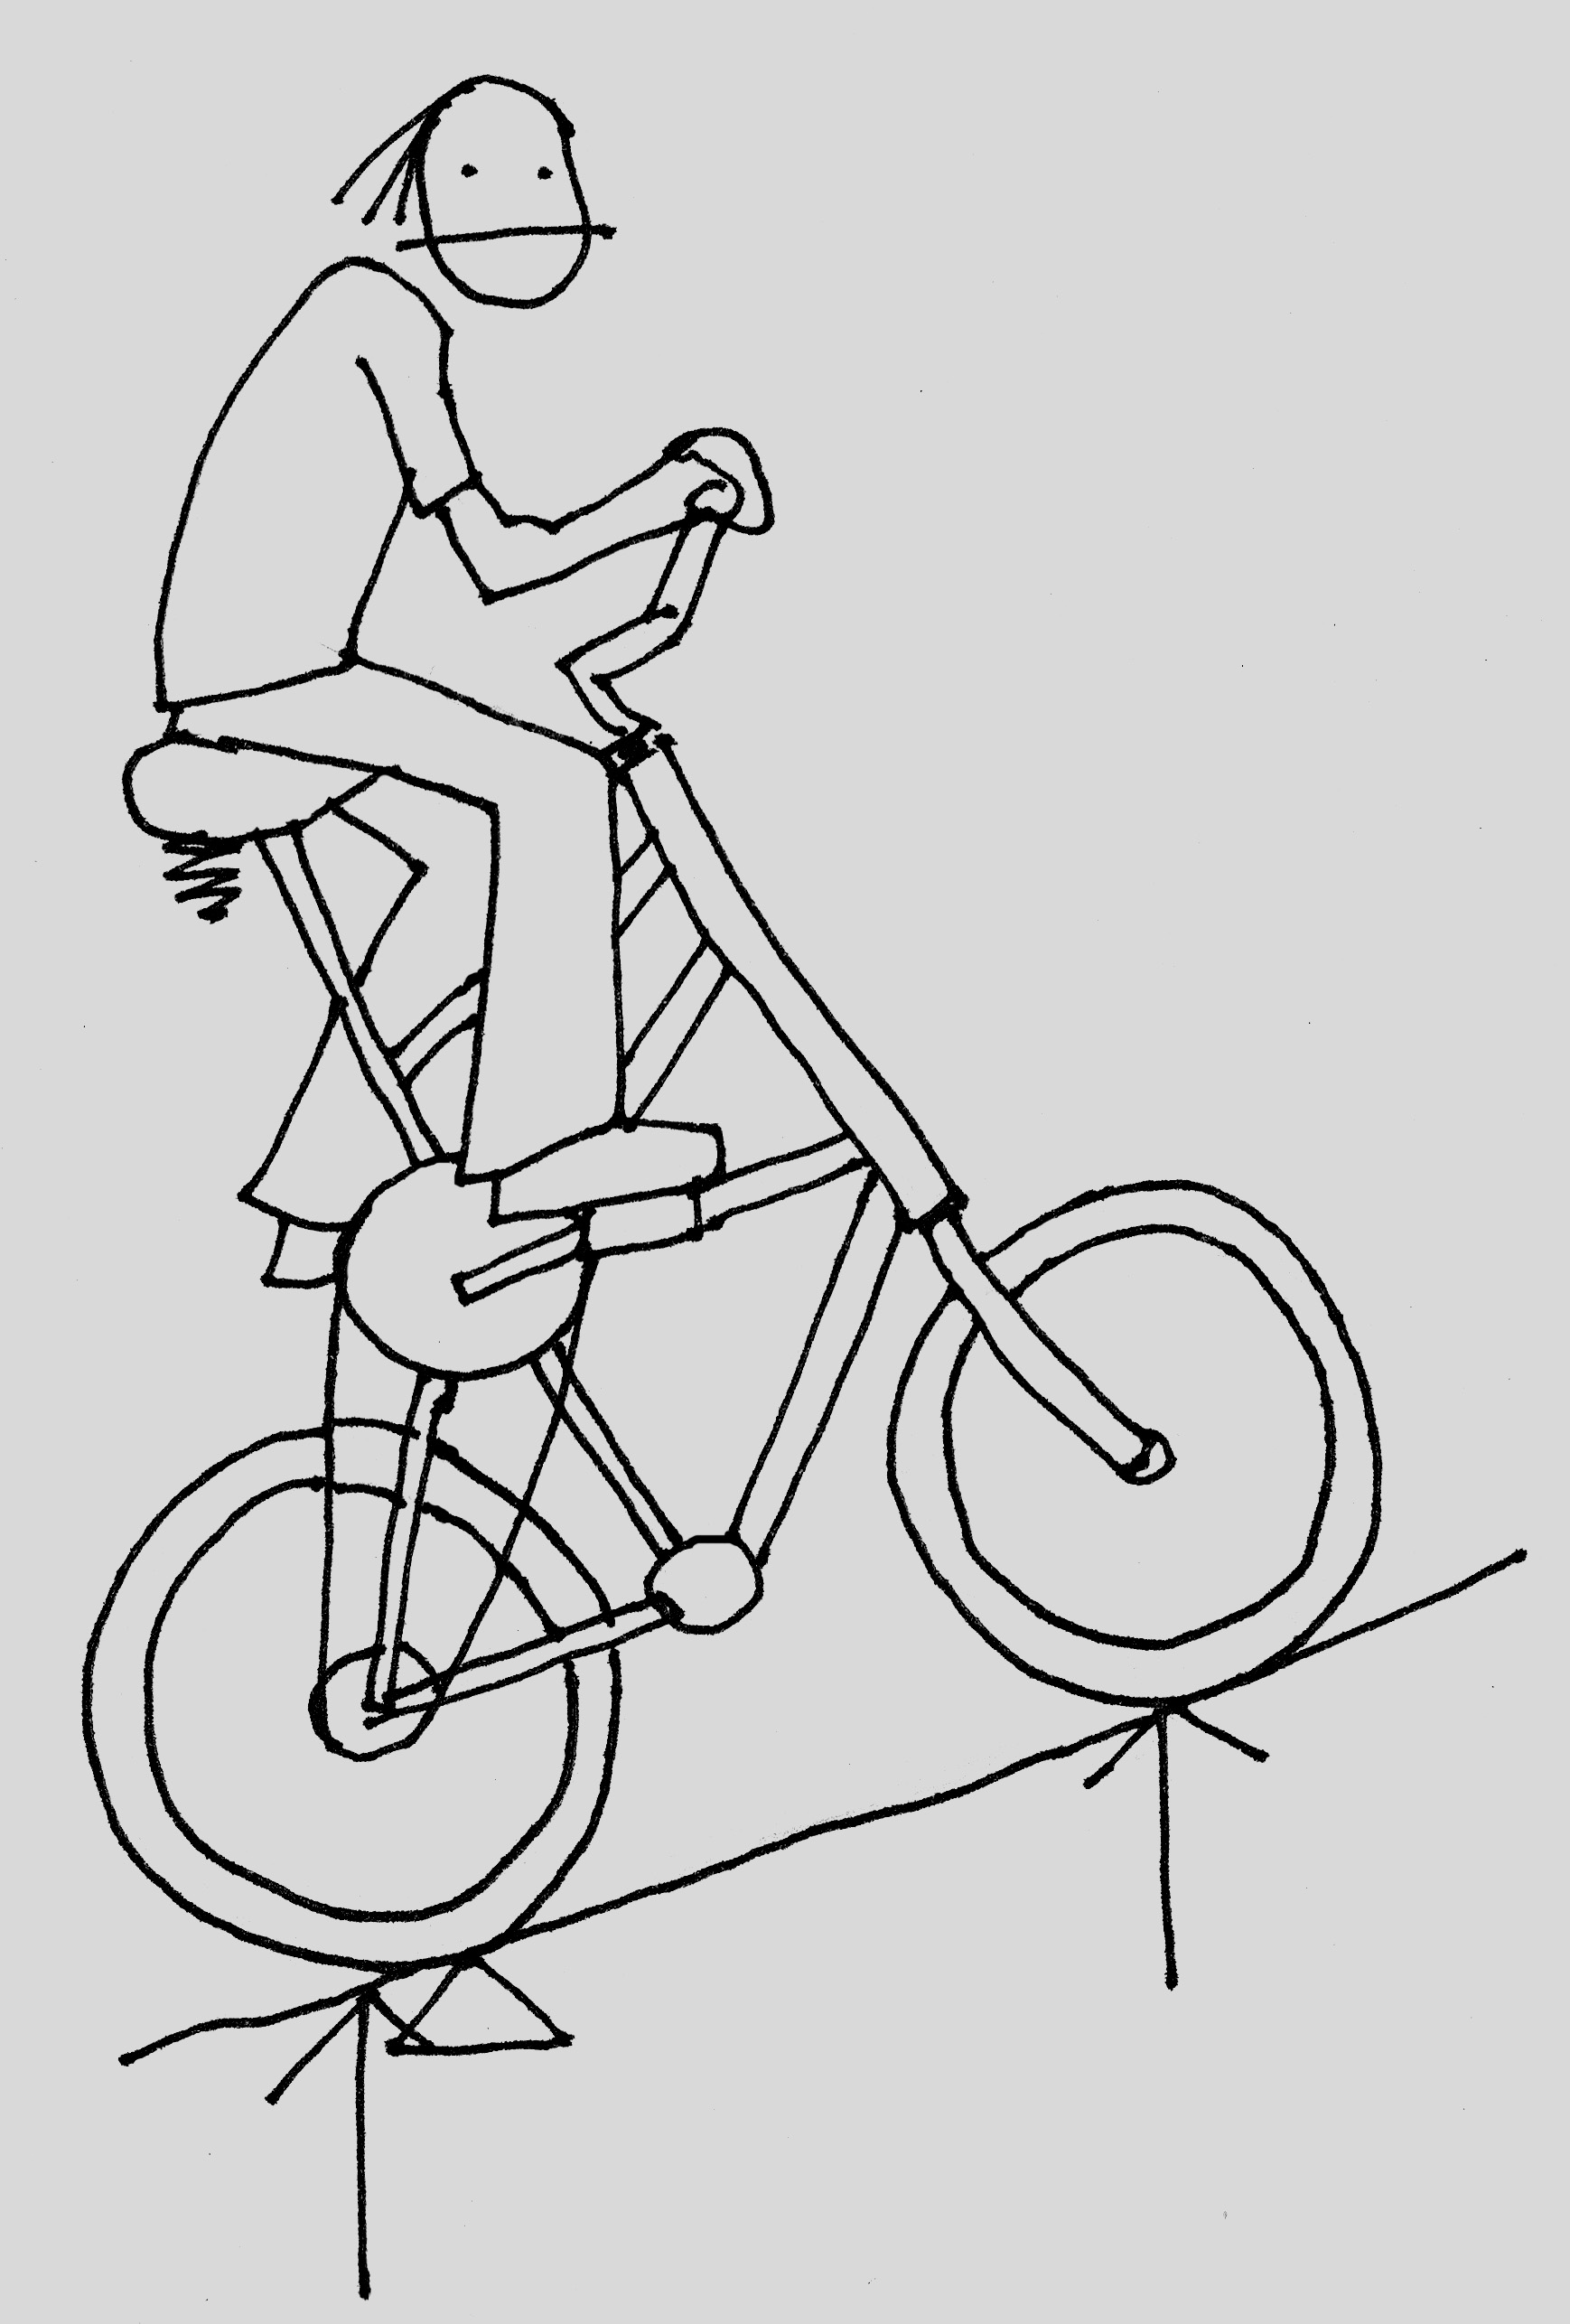
The bottom bracket is the heart of a HARV, or high-altitude recon vehicle – commonly known as a 'tallbike'. It determines where the pilot will be on the ship. Make sure the height is good and the center of gravity is acceptable, as it is more sensitive to the effects of gravity wells.

There are three basic standard techniques to construct a high-altitude recon vehicle. The most common is stacking one ship above the other. The head tubes need to be aligned in order for the ship to steer without stress on the hull. The second design is to flip a standard hull and add cockpit supports. Be sure the helm and cockpit extensions are sturdy. The bottom bracket is flipped, so using a threaded shell means your cups will tend to loosen up - we've tacked them in place in the past but it's better to use cruiser-style cranks. The third is to rotate a standard hull, adding a front triangle and long fork.
Since the center-of-gravity problem is amplified on HARVs, many builders lengthen the wheelbase or use a bomber on the bottom half. This adds mass, but also cargo carrying capabilities.
Coaster Brakes and HARVs Do Not Mix
There are a few of reasons not to employ coaster brakes on a tallbike: first, it's trickier to keep from back pedalling during launch, therefore the pilot may inadvertently feather the coaster brake, causing the ship to stall during a critical moment. Brake levers allow independent braking during launch and dismount as well, which is important in heavy g-wells. Lastly, coaster brake bikes lose their ability to stop if the chain falls off, which is something you don't want to happen on any ship - let alone a HARV.